Using Kanzi Studio render pass templates
Use render passes to define the rendering of nodes in your Kanzi application. Each Scene node has the Render Pass property that determines which render pass Kanzi uses for rendering that Scene node. When you create a Scene node, it uses the DefaultRenderPass to render its content. To define the rendering of nodes in your application, create the hierarchy of render passes you need.
These render pass templates are available in Kanzi Studio to help you get started:
- Default Render Pass creates a basic set of render passes that first render opaque nodes and then transparent nodes. See Using the Default Render Pass.

- Render to Texture Pass creates the render passes you need to render to a texture. See Rendering to texture.

Using the Default Render Pass
Use the Default Render Pass template to create a basic set of render passes you need to get started.
To use the Default Render Pass:
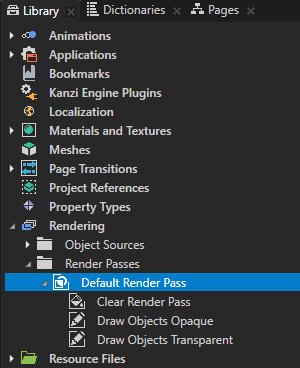
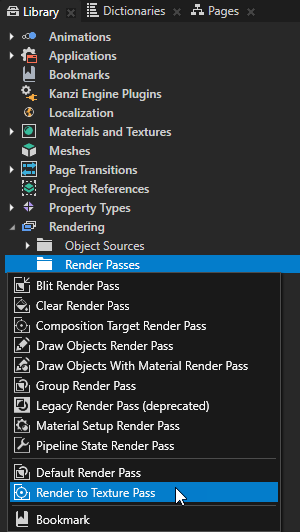
- In the Library > Rendering press Alt and right-click Render Passes and select Default Render Pass.
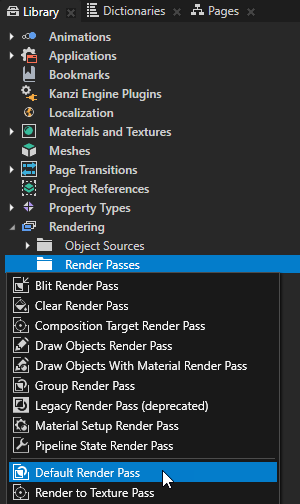
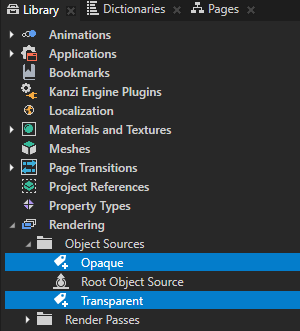
Kanzi Studio creates in the Library > Rendering the filters and render passes it needs to first render opaque nodes and then transparent nodes:- In Object Sources these Tag Filter filters:
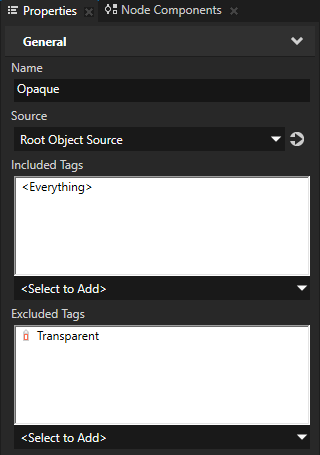
- Opaque picks the nodes that do not have the Transparent tag.
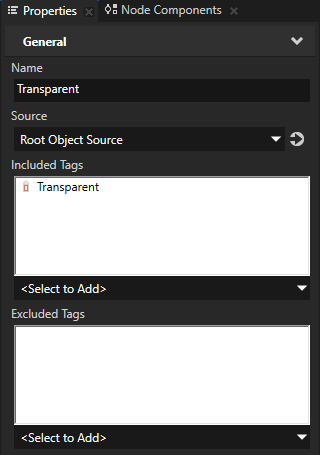
- Transparent picks the nodes that have the Transparent tag.
- In Render Passes a Group Render Pass named Default Render Pass and inside it:
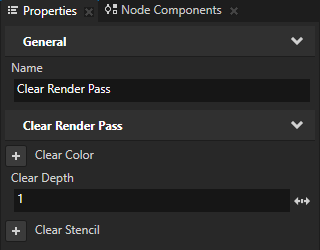
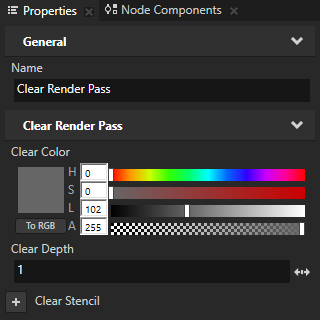
- Clear Render Pass by default clears depth.
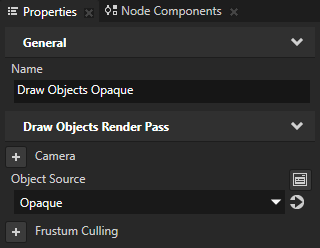
- Draw Objects Render Pass named Draw Objects Opaque renders the nodes picked by the Opaque filter.
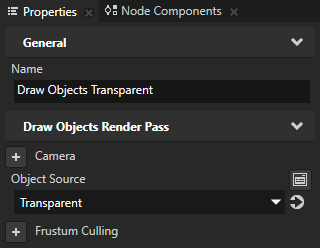
- Draw Objects Render Pass named Draw Objects Transparent renders the nodes picked by the Transparent filter.
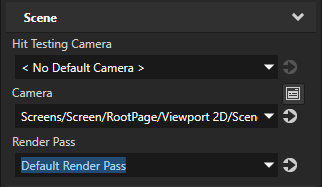
- In the Project select the Scene node the content of which you want to render and in the Properties set the Render Pass property to the Default Render Pass you created.
Kanzi Studio renders the Scene node using the Default Render Pass.
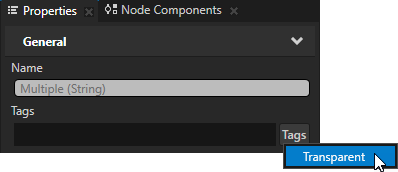
- (Optional) If your Scene node contains transparent nodes, in the Project select the nodes, in the next to the Tags property click the Tags button, and select Transparent.
This way you set the Default Render Pass to first render transparent nodes and then opaque nodes.
- (Optional) To set the background of the parent Viewport node of the Scene node the content of which you want to render, in the Default Render Pass you created select the Clear Render Pass and in the Properties add and set the Clear Color property.
Rendering to texture
Use the Render to Texture Pass template to create the render passes you need to render to a texture.
To use the Render to Texture Pass:
- In the Library > Rendering press Alt and right-click Render Passes and select Render to Texture Pass.
Kanzi Studio creates in the Library:
- In Materials and Textures > Textures a Render Target Texture
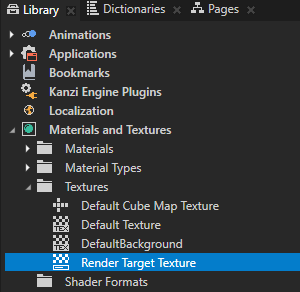
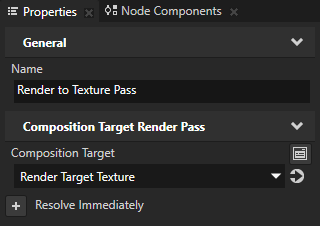
- In Rendering > Render Passes a Composition Target Render Pass named Render to Texture Pass, which renders itself to the Render Target Texture resource, and inside it:
- Clear Render Pass clears depth.
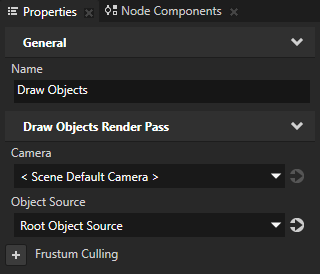
- Draw Objects Render Pass named Draw Objects renders all nodes.

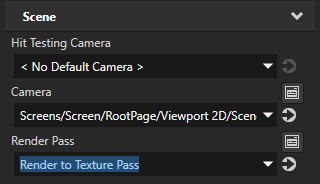
- In the Project select the Scene node the content of which you want to render to a texture and in the Properties set the Render Pass property to the Render to Texture Pass you created.
Kanzi Studio renders the Scene node using the Render to Texture Pass.
- Apply the Render Target Texture you created in the first step to a node where you want to show the content of the Scene node you selected in the previous step.
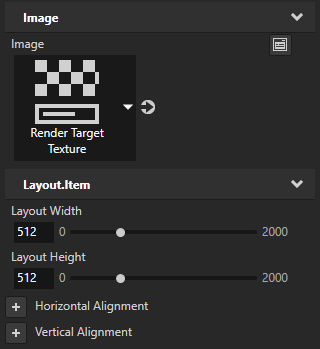
For example:- In the Project press Alt and right-click and select Image.
- In the Project select the Image node, and in the Properties set the Image property to the Render Target Texture you want to show in the Image node.
See also
Rendering
Rendering best practices
Using object sources
Filters
Distributing rendering across several frames

Open topic with navigation